How to Integrate Scoreapps with Your WordPress Blog
Activate the plugin WordPress REST API Authentication
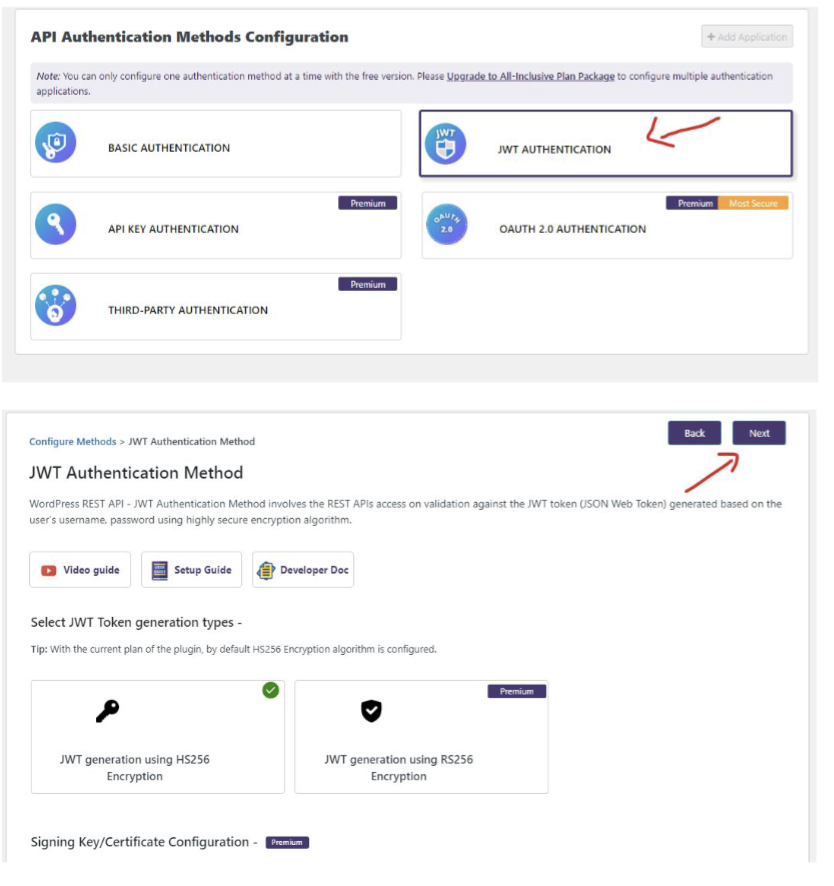
After installation, make sure JWT authentication is enabled in the plugin settings. Two-factor authentication must be disabled on your WordPress site.
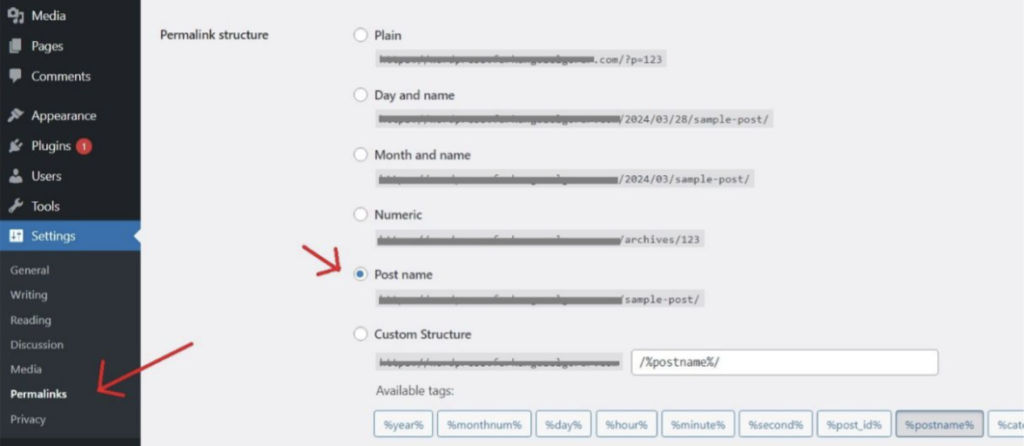
From the dashboard, go to Settings -> Permanent links and select the option postname (Entry Name).
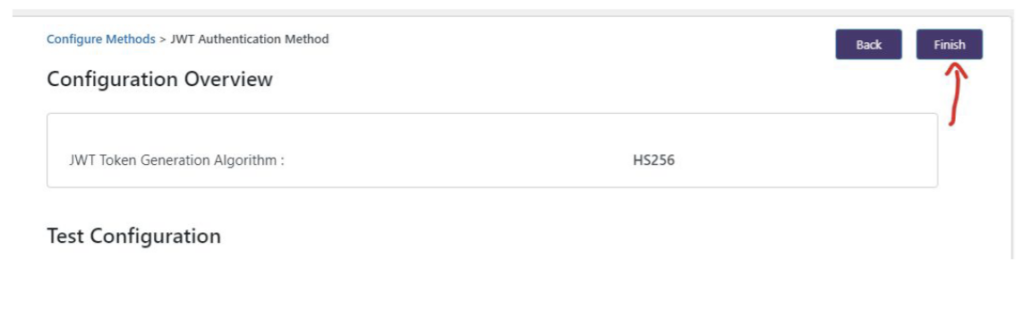
Once activation is complete, follow the following steps that appear in the Plugin settings menu and then press the button Finish.

The fields you see correspond to the same options that WordPress offers when creating an entry, but integrated into Scoreapps to publish directly from there:
Comment Status (Open/Close): Indicate whether you want to allow comments on your post.
open Allows users to leave comments on the post once it is published.
Close It blocks comments, so the entry will not have an opinions section.
Publication status (Public/Private): Control post visibility in WordPress.
public publish the entry as normal, visible to any visitor to your site.
Private hides it from the public; only users with editing or administration permissions will be able to see it.
Category: Here you should choose the WordPress category or categories to which the post will belong (for example: News, Tutorials, Marketing, etc.). Help organize your content and improve navigation on your website.
Publish Date: Allows you to schedule the exact date and time when the entry will be published. If you leave it blank, it will be published immediately when you press “Share”.
Featured Media: It is the featured image or “cover” of the entry. This image will be shown in listings and previews. You must select or upload the image that best represents your item.
Together, these options give you control over how the post will be displayed in WordPress: who can see it, when it is published, whether it supports comments, and how it is categorized and visually presented.
Popular Articles
How to Create an App for Restaurants (with or without Delivery)
Text Enter First Steps Once inside the platform, from the main dashboard you will find a series of icons on the left hand side menu. Just click on 'Apps'. Then click on 'Create App' and give it a name. Then you'll get to a screen where you choose the ...APPS: Radio
The function of Radio allows the addition of radio broadcast within its application. In addition to this function To add this function to your application go to step "Functions" and click on the icon "Radio": Once added you must name this new ...APPS: Webhooks
The advanced Webhooks feature lets you connect certain events that occur in your App by sending them to a URL called Webhook. You can use a free Webhooks service as Zapier to create automations that can help you with your App business. For example, ...APPS: Audio & Music
How to add this feature To add this feature to your application go to step "FUNCTIONS" and click on the " iconAudio": Then give this new section of the application a name. Then click on the + icon to add a new Playlist Then add a title and an image ...QR Promotions
This function would allow you to create discount coupons that would be unlocked by scanning a specific QR code. Once unlocked, the customer can use the discount whenever they want. The coupon would not appear in the application until the user has ...
Related Articles
How to Use Integrations and Connect WordPress with Scoreapps
How to Use Integrations and Connect WordPress with Scoreapps Video tutorial: connect WordPress with Scoreapps Integrations connect Scoreapps with external systems. The main customer-facing integration is WordPress: it links blogs so BlogPilot can ...AI Agents in Scoreapps
Introduction Video tutorial: create a text chatbot in Scoreapps Voice is covered in separate guides. See Voice Agents in Scoreapps or how to enable voice calls inside a chatbot. Scoreapps AI Agents are one of the most powerful features of the ...How to integrate Chatbots with Telegram
Overview This integration allows you to connect your ScoreApps chatbot with Telegram, allowing users to chat with your AI directly in the app. How to configure the integration with Telegram: Step 1: Create a Telegram bot Open the Telegram app on your ...Voice Agents in Scoreapps
Voice Agents in Scoreapps Video tutorial: how to create a voice agent in under 3 minutes Voice Agents let you create a conversational assistant that speaks with your visitors, follows the instructions you define, and can be trained with your business ...How to Automate WordPress Article Publishing
A well-crafted blog is one of the most profitable assets of a business: it generates organic traffic, authority, leads and sales in the medium term. The problem is the same as always: for it to really work you need consistency, good themes, structure ...