How to Customize Your Website Domain

Before customizing the domain of your website, you must set up your own SMTP server for the proper functioning of sending emails by following the steps indicated in our article:Configuring SMTP for each website
Otherwise system emails will never arrive
Step 1:You need a domain
You can hire it with the domain provider you want.

You can hire the Domain with the domain provider you want, however, even if your domain provider includes an SSL, that SSL certificate is normally intended for use in its own hosting or managed services,
ScoreApps uses Cloudflare as a free SSL proxy and manager,therefore,to domain configuration must be managed through Cloudflare, where the domain is assigned to the site and the SSL is issued from there.
Step 2: Set up your SSL with CloudFlare
The first thing is to go to CloudFlare and create an account by clicking on sign up
Select the Free plan to add a Website
- Enter an email and create a password
Once inside we go to the Left side panel and select Websites, then cylc in "Get Starter" or "Start" in English
We introduce our main domain without http or www, alone (domain.com) and press to continue
Then we select the Free plan and continue it
We click again to continue without touching anything else
We will appear a section where we will see 2 links (nameservers):
You will then need to access your domain provider and searchthe DNS server section where you will have to place these 2 links in the same order.CloudFlare.
Save and return to CloudFlare
Save and return to CloudFlare
Step 3:Place your domain on the Platform
Inside your Platform go to the Website section of the left side menu.
Once there you locate the site you want to customize the domain to and click on the gear icon
Then enter the domain into the "Associate Domain" field and click on the blue link icon
By accessing the site gear icon again, you will see that new icons now appear in the "Associate Domain" field
To continue we will CLICK on the black wrench icon
You will see that a window opens indicating the records to be configured in Cloudflare.
Step 4:Setting up Records in Cloudflare
We go back to CloudFlare and go to the DNS section > Records in the left side menu
Within the DNS section > Records we will have todelete any type A recordto appear there.
Then you will have to create the following records by replacing "domain.com domain" with the domain you are using:
Important: make sure you create CNAME with thecloud in gray (DNS only)
You will then have to add a rule for the.ww redirection to the main domain.com
Inside the Cloudflere dashboard go toRules > Page Rulesand set it up as in the following example:
- URL (required):www.tomain/*
- Select a configuration (mandatory): Forwarding URL
- Select status code (mandatory): 301: Permanent redirect
- Enter target URL (required): https:///domain/$1
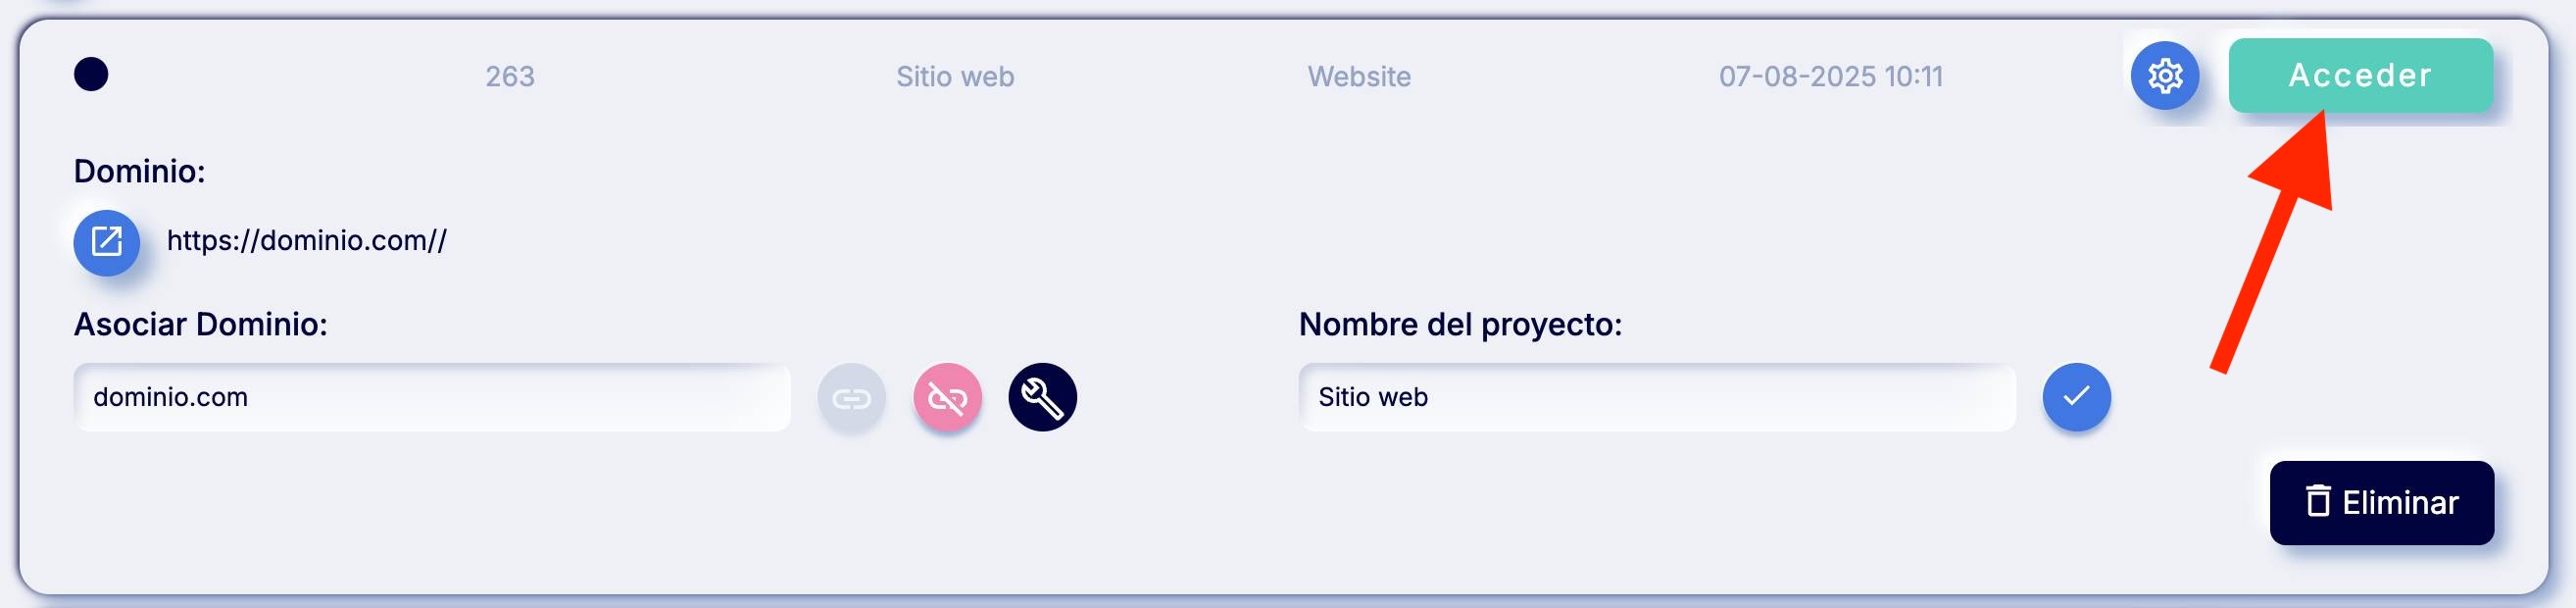
Step 5:Access to the Wordpress builder
Once you have completed the domain customization steps, the "Access" button on the platform will now take you to the Wordpress login page:
You should do the following:
1- Click on the link Forgot your password?
2- Then in the "User name or email" field, enter the email linked to your Scoreapps subscription and click on the "Get a new password" button.
3- You will receive an email from the senderwordpress@apps4pymes.comwith the "Reset password" from which you can set up an access password to access this site.
4- Then go back to the Wordpress login page and log in with the created user and password.
We recommend checking the box "Remember me" so that you can quickly access the next few times.
We recommend checking the box "Remember me" so that you can quickly access the next few times.
Special case: when the domain is on Cloudflare and it shows the Scoreapps login instead of the website
Sometimes, when you personalize your domain via Cloudflare and set a CNAME pointing to apps4pymes.com, Cloudflare may not resolve it correctly because both domains are on Cloudflare. As a result, the browser redirects to the platform’s main domain and you see:
-
www.yourdomain.comshows the login or access page of Scoreapps instead of your site.
Recommended fix (DNS + domain mapped in the platform)
-
Delete the CNAME record on the root/apex if you have it (e.g.,
yourdomain.com→apps4pymes.com). - Create these records in Cloudflare:
-
yourdomain.com→ A →37.27.139.134(proxy on). -
www→ CNAME →@(proxy on).
-
Note: the IP value may change. If you’re not sure, open a ticket and we’ll confirm the correct IP for your server.
- Important: even with perfect DNS, if it still shows the login or redirects to apps4pymes.com, it means the domain mapping in the platform is not complete yet. In that case, open a ticket and include:
-
your domain (
yourdomain.com/www.yourdomain.com) - the site owner/account
- the Scoreapps site it should point to
-
your domain (
Popular Articles
How to Create an App for Restaurants (with or without Delivery)
Text Enter First Steps Once inside the platform, from the main dashboard you will find a series of icons on the left hand side menu. Just click on 'Apps'. Then click on 'Create App' and give it a name. Then you'll get to a screen where you choose the ...APPS: Radio
The function of Radio allows the addition of radio broadcast within its application. In addition to this function To add this function to your application go to step "Functions" and click on the icon "Radio": Once added you must name this new ...APPS: Webhooks
The advanced Webhooks feature lets you connect certain events that occur in your App by sending them to a URL called Webhook. You can use a free Webhooks service as Zapier to create automations that can help you with your App business. For example, ...APPS: Audio & Music
How to add this feature To add this feature to your application go to step "FUNCTIONS" and click on the " iconAudio": Then give this new section of the application a name. Then click on the + icon to add a new Playlist Then add a title and an image ...QR Promotions
This function would allow you to create discount coupons that would be unlocked by scanning a specific QR code. Once unlocked, the customer can use the discount whenever they want. The coupon would not appear in the application until the user has ...
Related Articles
How to Upload Custom Fonts Using Divi Font Upload
Improving your website typography with custom sources can significantly improve its visual appeal and brand. Divi font loading feature makes it easy to add and use custom fonts, allowing you to create a unique and professional look for your site. In ...Adding Custom Fields to the Divi Email Optin Module
Adding custom fields to the Divi email subscription module allows you to create custom subscription forms and collect additional information. Divi Email Subscription module supports several email providers. You can create custom data fields within ...Custom SMTP Configuration in Scoreapps
Custom SMTP Configuration in Scoreapps Custom SMTP allows emails sent by Scoreapps tools to use a consistent brand identity. It is especially useful for partners, agencies and accounts that need audits, notifications and automated communications to ...Available plugins
In this guide you will find a brief description of the plugins available in our WordPress Multisite environment. These plugins can be activated from your site plugins section according to your needs. If you want to request an additional plugin, check ...Using Box Shadow Options in Divi
Box shadow options in Divi allow you to give any item on the page the illusion of depth. Projected shadows are a creative way to bring your website design elements to life. They can highlight elements and even give a great 3D effect. In this guide, ...